How to Set Up a WordPress Website on Amazon EC2 2023: A Step-by-Step Guide
Scenario:
Meet Sarah, a small business owner who’s eager to establish her online presence by creating a professional WordPress website for her boutique flower shop. She wants to build a beautiful and functional website that not only showcases her floral arrangements but also allows customers to place orders online. Sarah has heard about the flexibility and scalability of Amazon Web Services (AWS) and wants to host her WordPress website on an Amazon EC2 instance. She’s a novice when it comes to server management but is determined to set up her website herself to save costs and gain full control over her online platform. With your step-by-step guide, Sarah will be able to accomplish her goal and launch her flower shop’s WordPress website on Amazon EC2 successfully.
Objective:
The objective of this blog is to guide readers in setting up a WordPress website using the LAMP stack on an Amazon EC2 instance. By the end of this tutorial, you will have learned how to:
LAMP Stack: Set up the foundational LAMP (Linux, Apache, MySQL, PHP) stack on your EC2 instance.
WordPress Installation: Install and configure WordPress on your EC2 server.
Security Measures: Implement essential security measures to protect your WordPress site.
Domain Connection: Point your domain name to your EC2 instance for public access.
Step 1: Launch an Amazon EC2 Instance
- Log in to your AWS account.
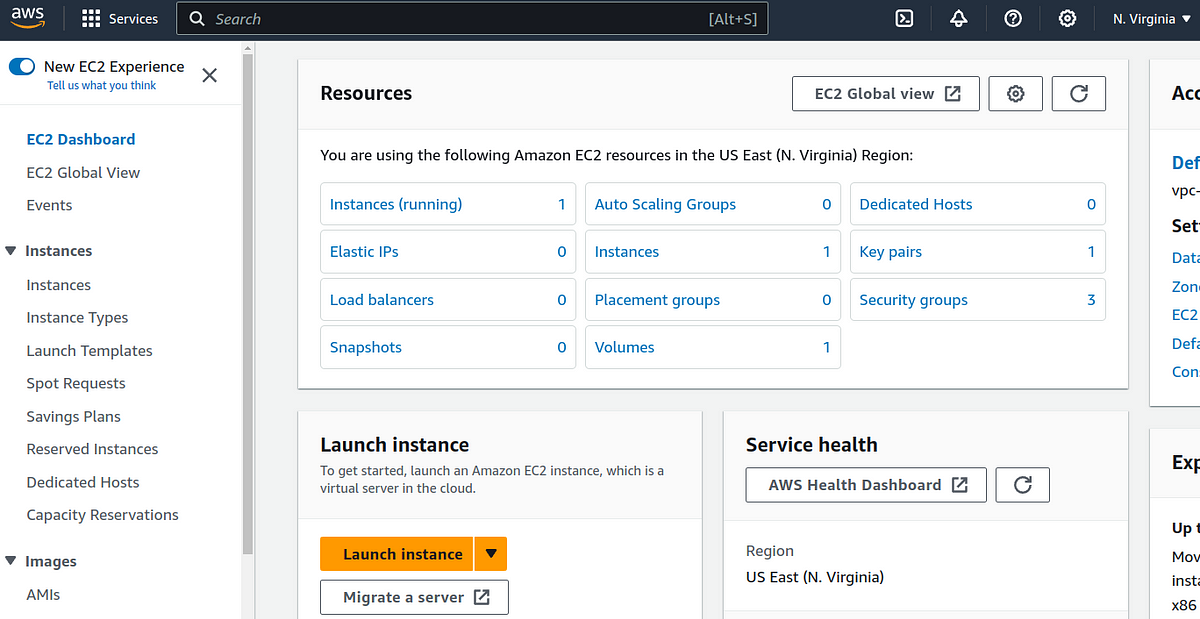
- Navigate to the EC2 dashboard.
Click “
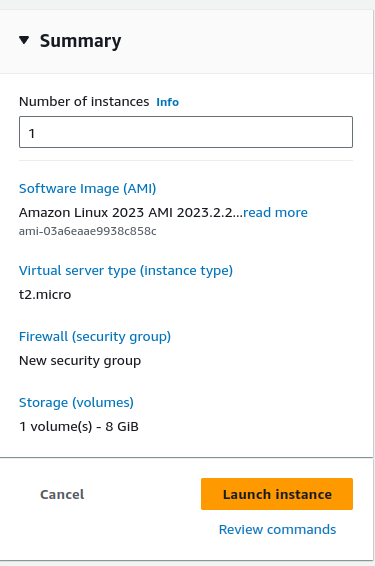
Launch Instance” to start theEC2instance creation process.Select an
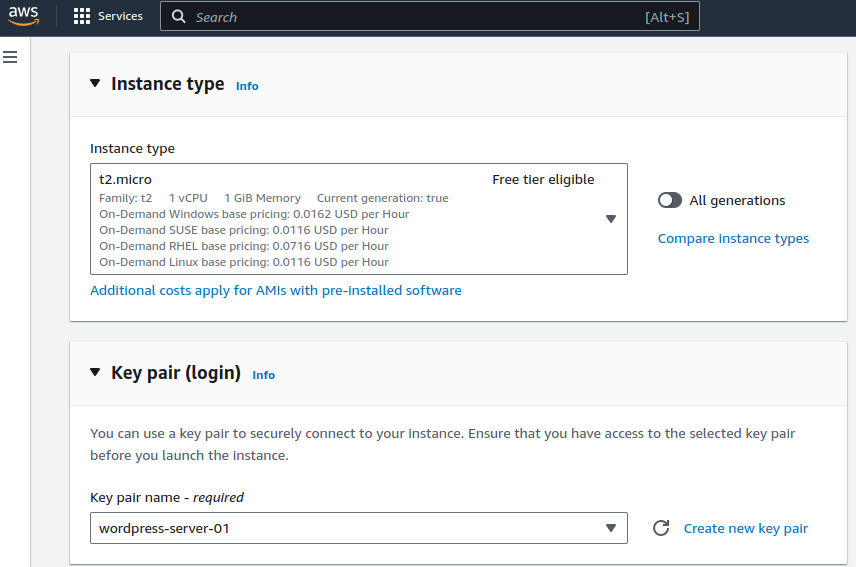
Amazon Machine Image (AMI)for your instance, such as “Amazon Linux 2.”Choose an instance type based on your requirements.
- Choose or create an SSH key pair to access your instance securely.
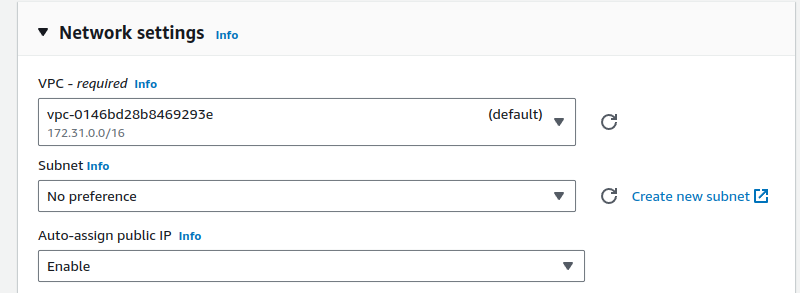
- Configure instance details like network settings, storage, and tags.
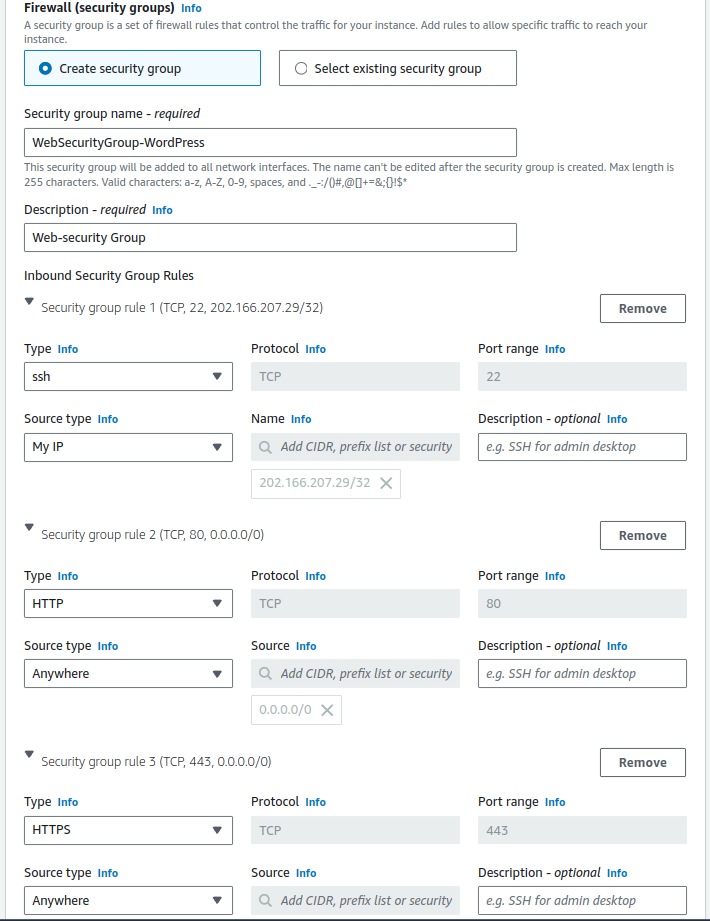
- Create or select an existing security group allowing inbound traffic on ports 80 (HTTP) and 443 (HTTPS).
- Review your instance settings and click “Launch.”
- Click “Launch Instances.”
Step 2: Connect to Your EC2 Instance
- Once your instance is running, select it in the EC2 dashboard.
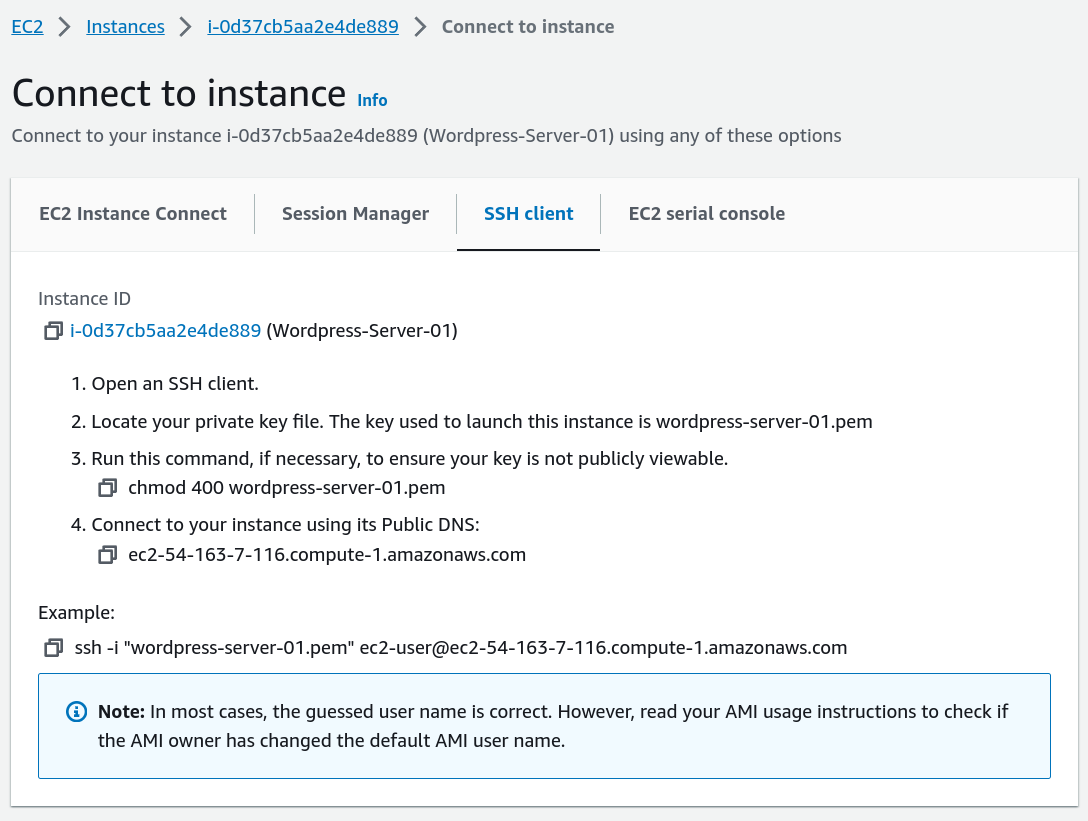
- Click “Connect” to view connection instructions.
- Use an SSH client to connect to your instance using the provided public DNS and private key (.pem) file.
Step 2: Update Your System
First, connect to your EC2 instance via SSH and update your system to ensure all packages are up to date:
sudo dnf update -y
Step 3: Install Apache, PHP, and MariaDB
Install Apache web server, PHP, and its necessary modules, along with MariaDB, a community-developed fork of MySQL:
sudo dnf install -y httpd wget php-fpm php-mysqli php-json php php-devel
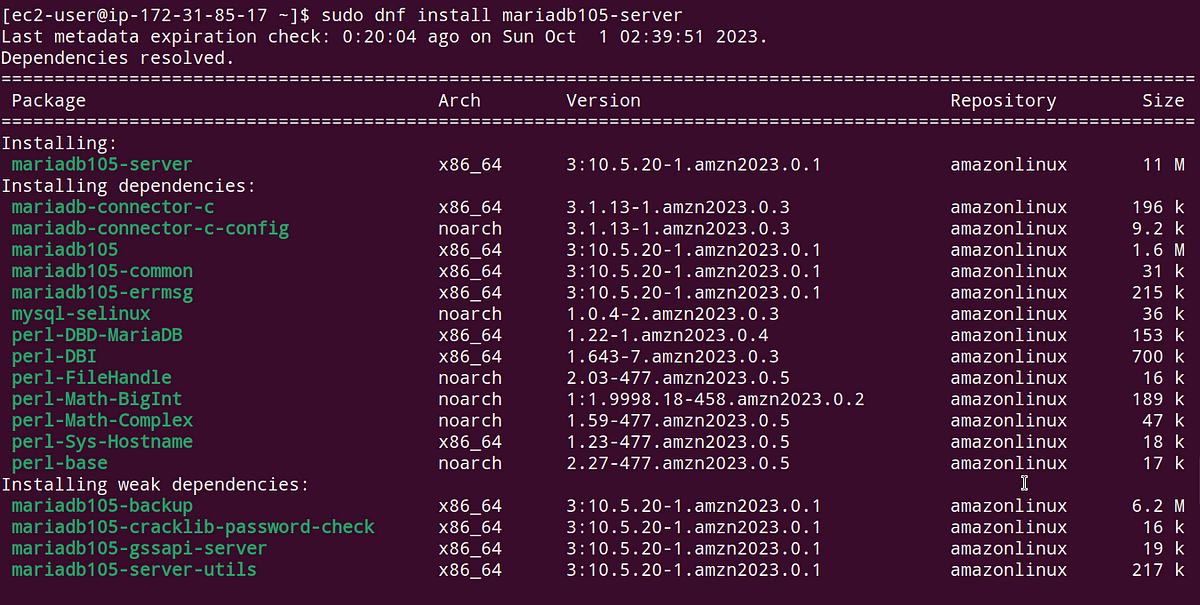
sudo dnf install -y mariadb105-server
To check the MariaDB version:
dnf info mariadb105

Step 4: Start and Configure Apache
Start the Apache server and enable it to launch on boot:
sudo systemctl start httpd && sudo systemctl enable httpd
Verify if Apache is enabled:
sudo systemctl is-enabled httpd

Add your user (ec2-user) to the Apache group:
sudo usermod -a -G apache ec2-user
Then, log out and log back in again to refresh your groups:
exit
groups

Step 5: Configure Permissions
Adjust the permissions for your web directory:
sudo chown -R ec2-user:apache /var/www
sudo chmod 2775 /var/www && find /var/www -type d -exec sudo chmod 2775 {} \;
find /var/www -type f -exec sudo chmod 0664 {} \;
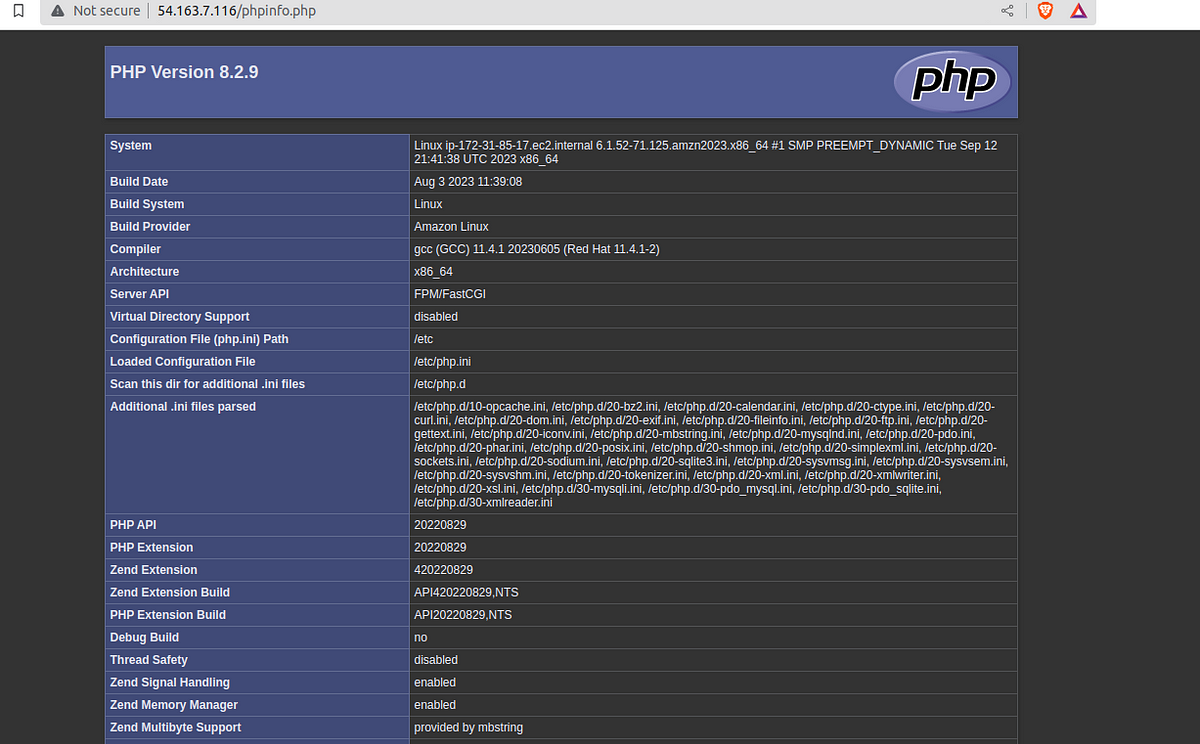
Test PHP installation by creating a PHP file:
echo "<?php phpinfo(); ?>" > /var/www/html/phpinfo.php
After verifying it works by accessing http://your-ec2-public-dns/phpinfo.php, remove the file:
rm /var/www/html/phpinfo.php
Step 6: Install and Start MariaDB
Start MariaDB and secure your installation:
sudo systemctl start mariadb
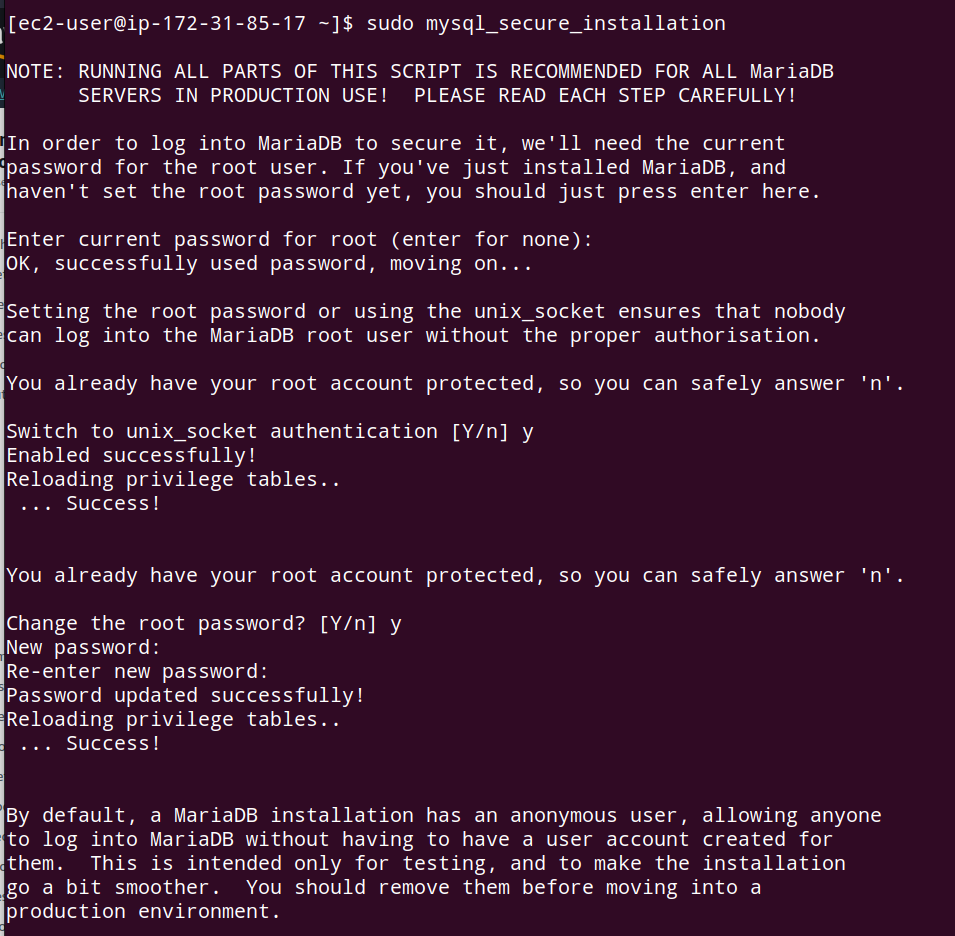
sudo mysql_secure_installation
Secure the MySQL installation with the
mysql_secure_installationcommand.Type Y to remove the anonymous user accounts.
Type Y to disable the remote root login.
Type Y to remove the test database.
Type Y to reload the privilege tables and save your changes.
Step 7: Install WordPress
Download the latest WordPress package and extract it:
wget https://wordpress.org/latest.tar.gz
tar -xzf latest.tar.gz
Start both Apache and MariaDB if not already running:
sudo systemctl start mariadb httpd
Step 8: Create a Database for WordPress
Access the MySQL shell as root:
mysql -u root -p
Then, create a new database and user for WordPress:
CREATE USER 'wordpress-user'@'localhost' IDENTIFIED BY 'your_strong_password';
Create your database. Give your database a descriptive, meaningful name, such as wordpress-db.
CREATE DATABASE `wordpress-db`;
Grant full privileges for your database to the WordPress user that you created earlier.
GRANT ALL PRIVILEGES ON `wordpress-db`.* TO "wordpress-user"@"localhost";
Flush the database privileges to pick up all of your changes.
FLUSH PRIVILEGES;
Exit the mysql client.
exit
Step 9: Configure WordPress
Copy the WordPress sample configuration file and edit it with your database details:
cp wordpress/wp-config-sample.php wordpress/wp-config.php
nano wordpress/wp-config.php
Update the database name, user, and password in the wp-config.php file.
define('DB_NAME', 'wordpress-db');
define(‘DB_USER’, ‘wordpress-user’);
define(‘DB_PASSWORD’, ‘your_strong_password’);
Step 10: Deploy WordPress
Copy the WordPress files to your web directory:
cp -r wordpress/* /var/www/html/
If you wish to install WordPress in a subdirectory, such as /blog, create the directory and copy the files:
mkdir /var/www/html/blog
cp -r wordpress/* /var/www/html/blog/
Step 11: Configure Apache
Before finalizing the installation, you may need to adjust the Apache configuration:
sudo nano /etc/httpd/conf/httpd.conf
Find the section that starts with <Directory "/var/www/html">.
Change the AllowOverride None line in the above section to read AllowOverride All.
Step 12: Finalize the Installation
Restart Apache to apply the changes:
sudo systemctl restart httpd
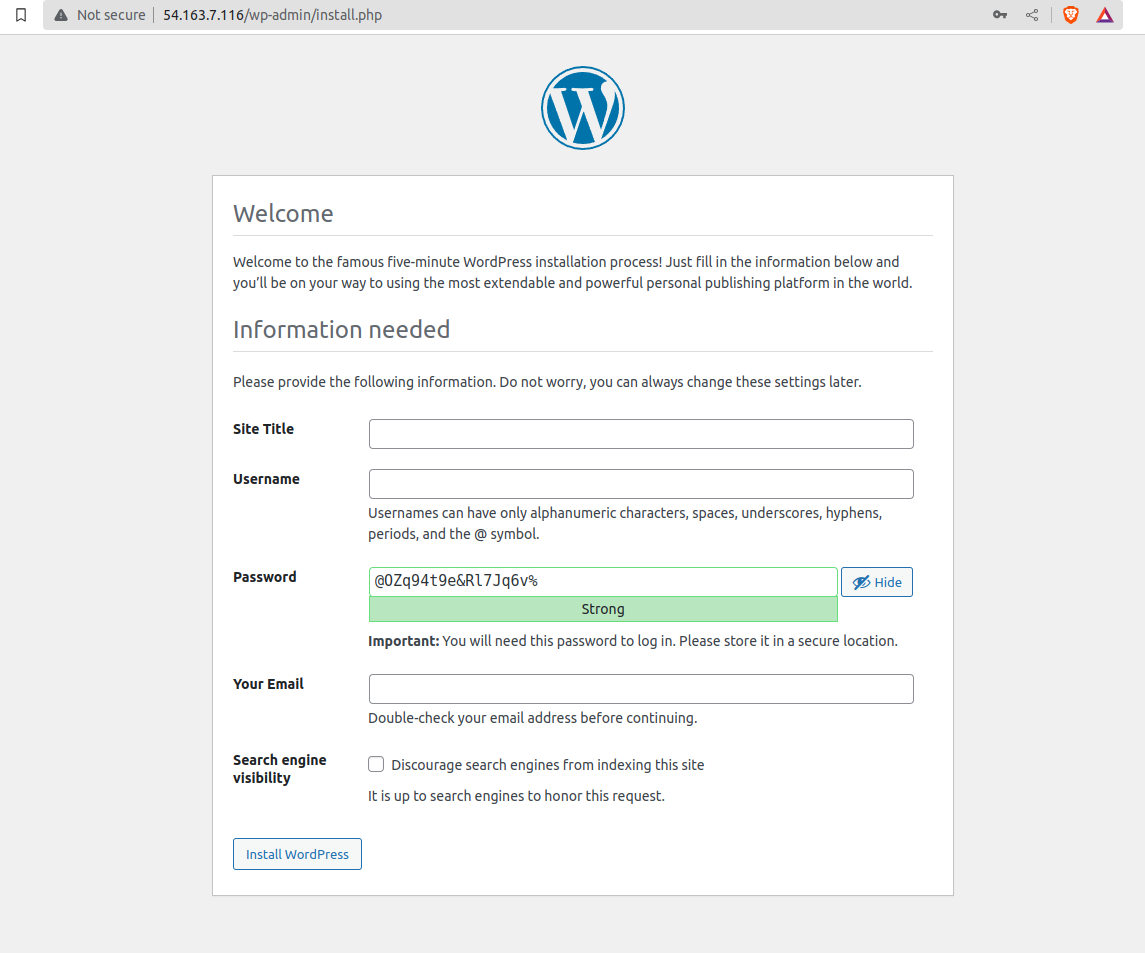
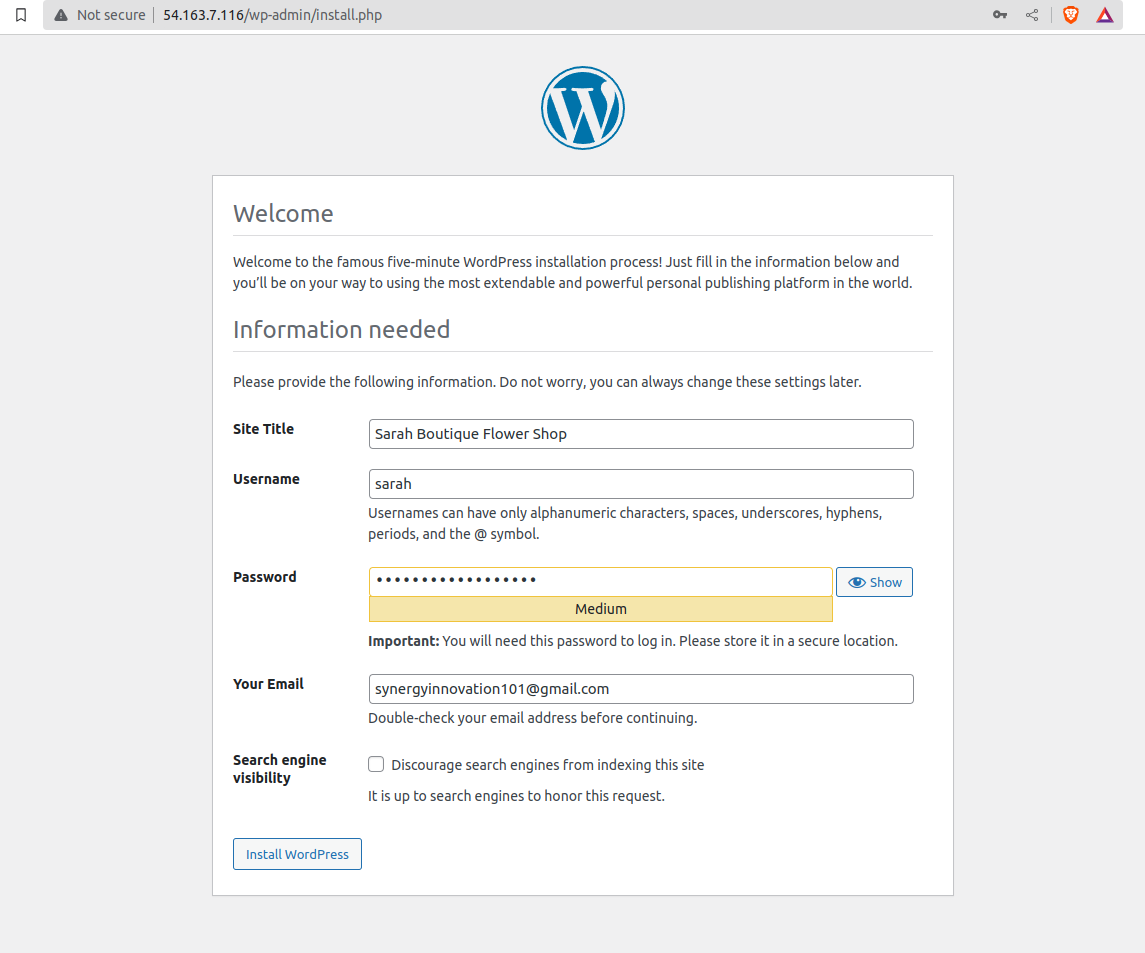
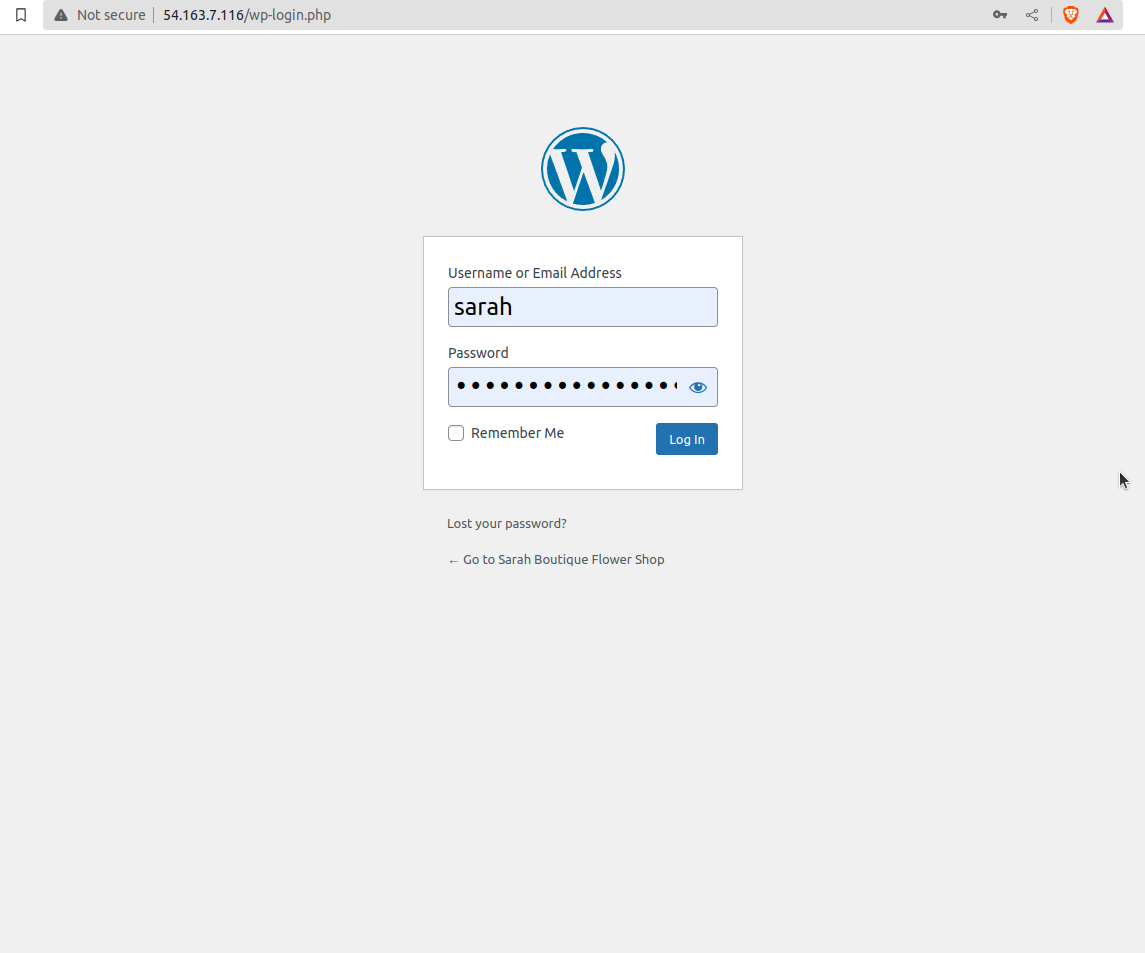
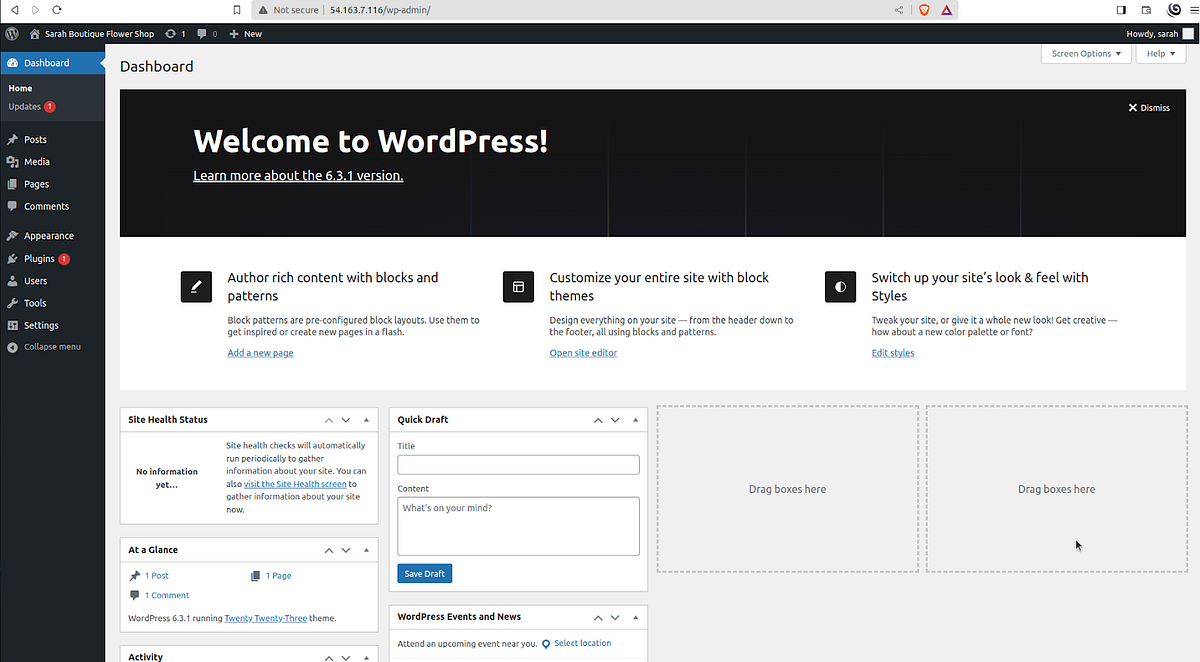
Now, complete your WordPress installation by navigating to http://your-ec2-public-dns/ or http://your-ec2-public-dns/blog if you installed it in a subdirectory. Follow the on-screen instructions to finish the setup.
Congratulations! You have successfully installed WordPress on your Amazon EC2 instance using the 2023 Amazon Linux AMI.
Step 12: Point Your Domain to EC2
To make your WordPress site accessible via your domain:
Log in to your domain registrar’s control panel.
Navigate to DNS management settings.
Create an "A" record pointing to your EC2 instance’s public IP address.
Optionally, set up a "CNAME" record for the www subdomain to redirect to your main domain.
After DNS propagation, you should be able to access your WordPress site using your domain name.
Congratulations! You've successfully installed WordPress on an Amazon EC2 instance. You're now ready to customize your site and start publishing content.
If you want to install WordPress with script:
For Ubuntu:
#!/bin/bash
# Define parameters
DB_NAME="wordpress_db"
DB_USER="iamadmin"
DB_PASSWORD="Admin123456789"
WP_PATH="/var/www/html/"

# Update system
echo "Updating system..."
sudo apt update -y

# Install required packages
echo "Installing necessary packages..."
sudo apt install -y apache2 mysql-server php libapache2-mod-php php-mysql unzip

# Secure MySQL installation
echo "Securing MySQL installation..."
sudo mysql_secure_installation

# Create the WordPress database and user
echo "Creating WordPress database and user..."
sudo mysql -e "CREATE DATABASE $DB_NAME;"
sudo mysql -e "CREATE USER '$DB_USER'@'localhost' IDENTIFIED BY '$DB_PASSWORD';"
sudo mysql -e "GRANT ALL PRIVILEGES ON $DB_NAME.* TO '$DB_USER'@'localhost';"
sudo mysql -e "FLUSH PRIVILEGES;"

# Download and set up WordPress
echo "Downloading and setting up WordPress..."
sudo rm -rf /var/www/html/*
sudo wget -qO- https://wordpress.org/latest.tar.gz | sudo tar xvz -C /var/www/html/
sudo mv /var/www/html/wordpress/* /var/www/html/
sudo rm -rf /var/www/html/wordpress
sudo chown -R www-data:www-data /var/www/html/
sudo chmod -R 755 /var/www/html/

# Configure WordPress
echo "Configuring WordPress..."
sudo cp $WP_PATH/wp-config-sample.php $WP_PATH/wp-config.php
sudo sed -i "s/database_name_here/$DB_NAME/g" $WP_PATH/wp-config.php
sudo sed -i "s/username_here/$DB_USER/g" $WP_PATH/wp-config.php
sudo sed -i "s/password_here/$DB_PASSWORD/g" $WP_PATH/wp-config.php

# Configure Apache
echo "Configuring Apache..."
sudo cp /etc/apache2/sites-available/000-default.conf /etc/apache2/sites-available/wp-config.conf
sudo sed -i "s|DocumentRoot /var/www/html|DocumentRoot $WP_PATH|" /etc/apache2/sites-available/wp-config.conf
sudo sed -i "s|<Directory /var/www/html>|<Directory $WP_PATH>|" /etc/apache2/sites-available/wp-config.conf

# Restart Apache
echo "Restarting Apache..."
sudo systemctl restart apache2

echo "Wordpress successfully installed and configured!!"
Subscribe for more!!


