

Whether you're a developer, a database administrator, or simply curious about cloud technologies, this guide will walk you through the process of creating and connecting to a SQL database in Azure. Azure's platform offers robust tools for database management, and I'm here to show you how to navigate them with ease.
Scenario: Running Analytics on a Sales Database in Azure
Imagine you're a data analyst at a growing e-commerce company. You need to analyze your sales data to identify trends, understand customer behavior, and inform marketing strategies.
Here's how you can use the steps outlined in this blog to achieve your goal:
1. Create an Azure SQL Database: Follow the steps mentioned in the blog to create a new database named "SalesData" within your existing resource group "EcommerceData." Choose the "Development" tier and public endpoint for initial testing.
2. Upload your Sales Data: Export your sales data (e.g., customer information, order details, purchase history) from your current system into a format compatible with SQL databases (like CSV). Use tools like Azure Data Factory or Azure Storage Blobs to upload the data into your newly created database.
3. Connect to the Database and Write Queries: Use the Query editor (preview) and connect to your "SalesData" database using the credentials you set earlier. Now, you can write and run SQL queries to explore your data.
Example Queries:
Total sales by product category:
SELECT Category, SUM(Amount) FROM SalesData GROUP BY Category;Top 10 customers by revenue:
SELECT CustomerID, SUM(Amount) AS TotalSpent FROM SalesData GROUP BY CustomerID ORDER BY TotalSpent DESC TOP 10;Sales trends over time:
SELECT Month, SUM(Amount) AS TotalSales FROM SalesData GROUP BY Month ORDER BY Month ASC;
4. Analyze Results and Make Informed Decisions: Analyze the results of your queries to identify trends, patterns, and insights. Use this information to make data-driven decisions, such as:
Identifying best-selling products and adjusting marketing campaigns accordingly.
Segmenting customers based on their purchase history and tailoring promotions to specific groups.
Analyzing regional sales performance and optimizing inventory allocation.
By following these steps and leveraging the power of Azure SQL Database, you can unlock valuable insights from your sales data and make informed decisions to drive your e-commerce business forward.
Step 1: Navigate to Create Resources
Navigate to the Azure portal (https://azure.microsoft.com/en-us/get-started/azure-portal).
Once you're in, look for the "Create a resource" button to start the process. This is your gateway to all the services Azure has to offer.

Step 2: Search for SQL Database
- In the search bar, type "SQL Database" and click on the corresponding service once it appears.

Step 3: Initiate Database Creation
On the SQL Database page, you'll see a "Create" button. Clicking this will start the process of setting up your new database.
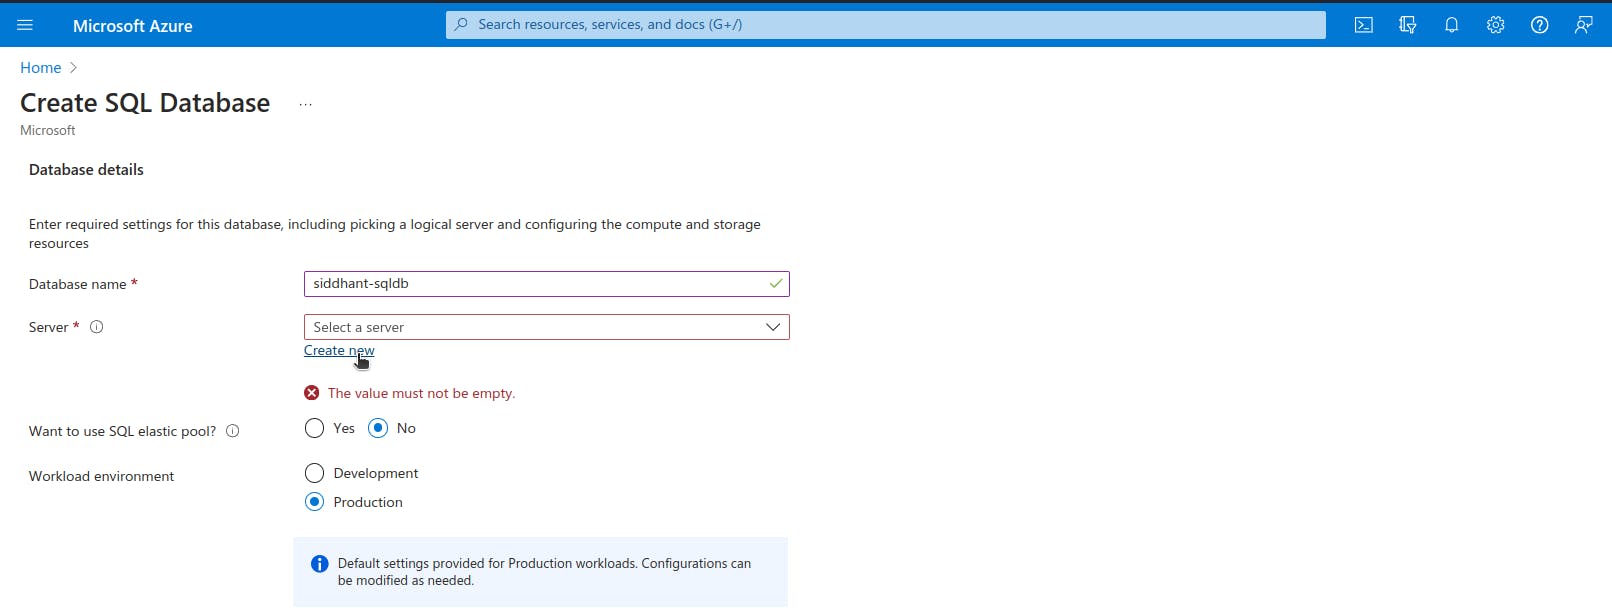
Resource Group: Select an existing resource group or create a new one to organize your Azure resources.
Database Name: Choose a unique and descriptive name for your database.
Server:
If you already have an Azure SQL server, select it from the drop down menu.
If not, click "Create server" and provide a name and location for your new server.


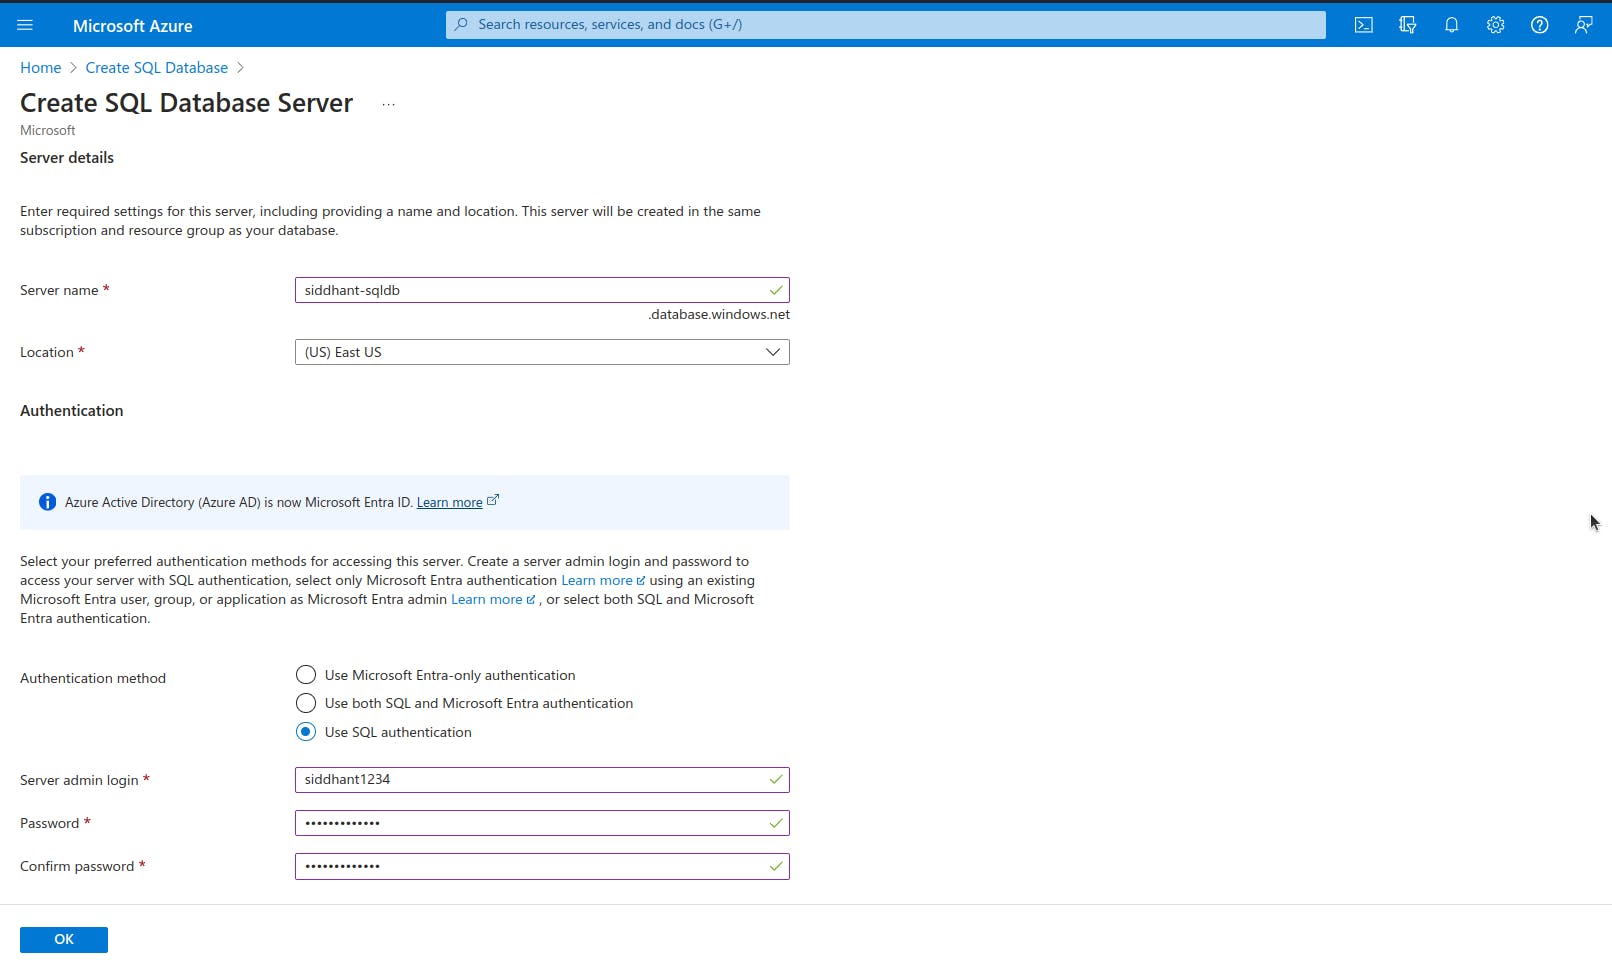
Step 4: Database Server Creation
Once you click on
create newunder database server you will redirect toCreate SQL Database Serverwindow.Authentication: Select "Use SQL authentication" and enter a secure username and password.
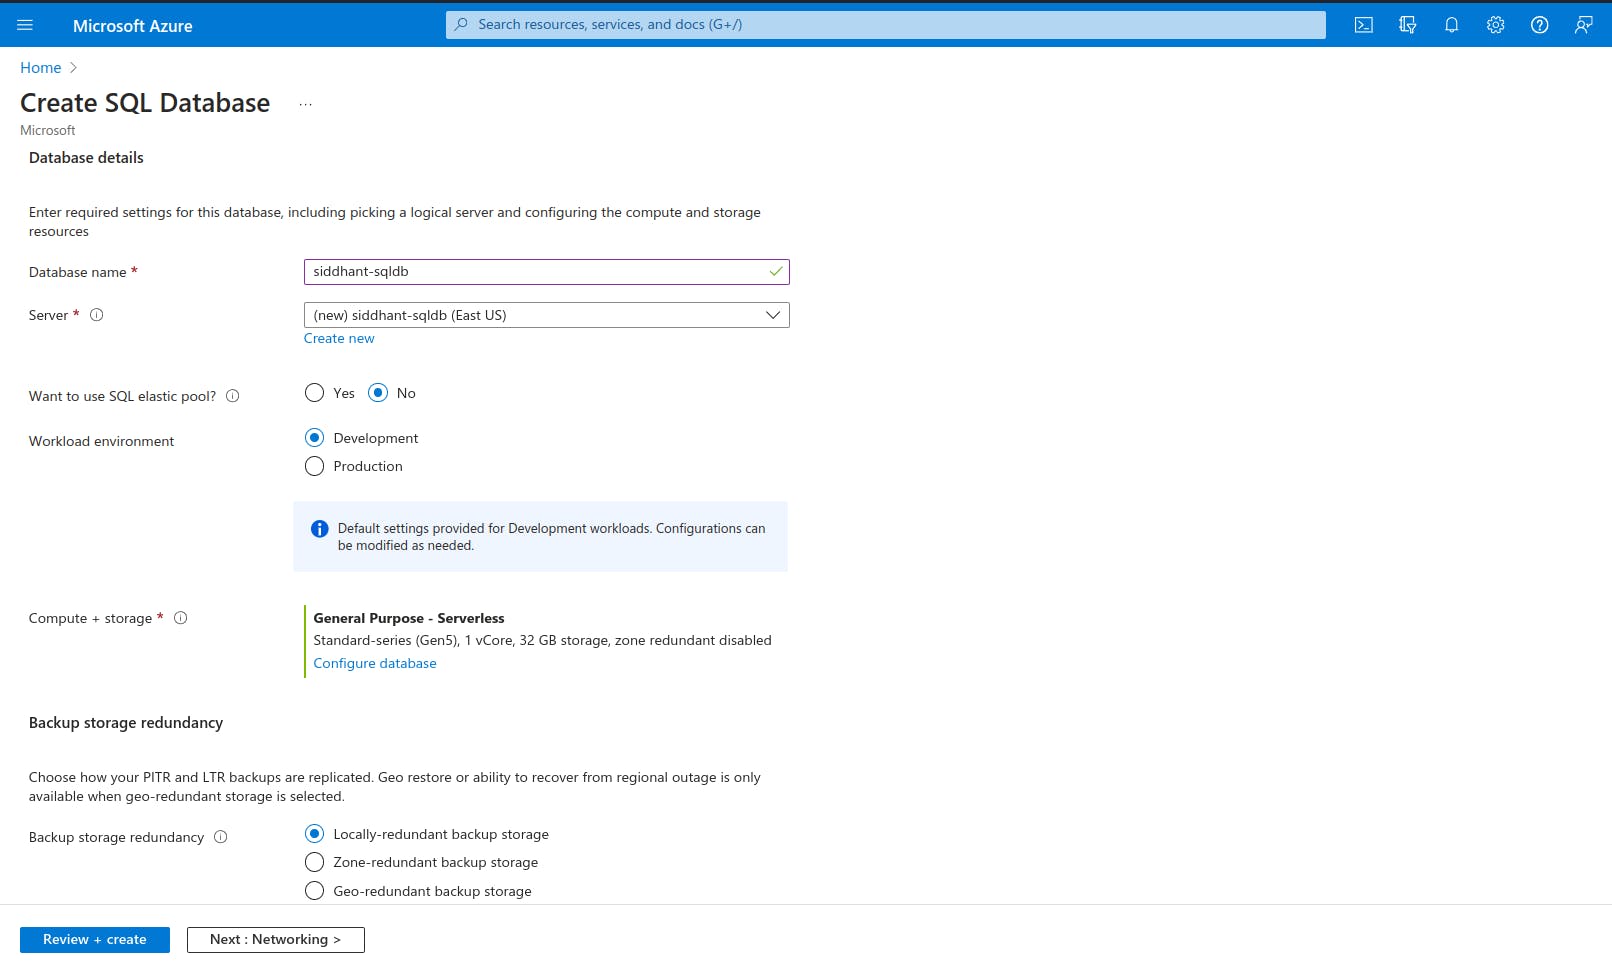
Tier: Choose "Development" for your initial exploration. You can always modify this later.
After completion of above steps click
OK.
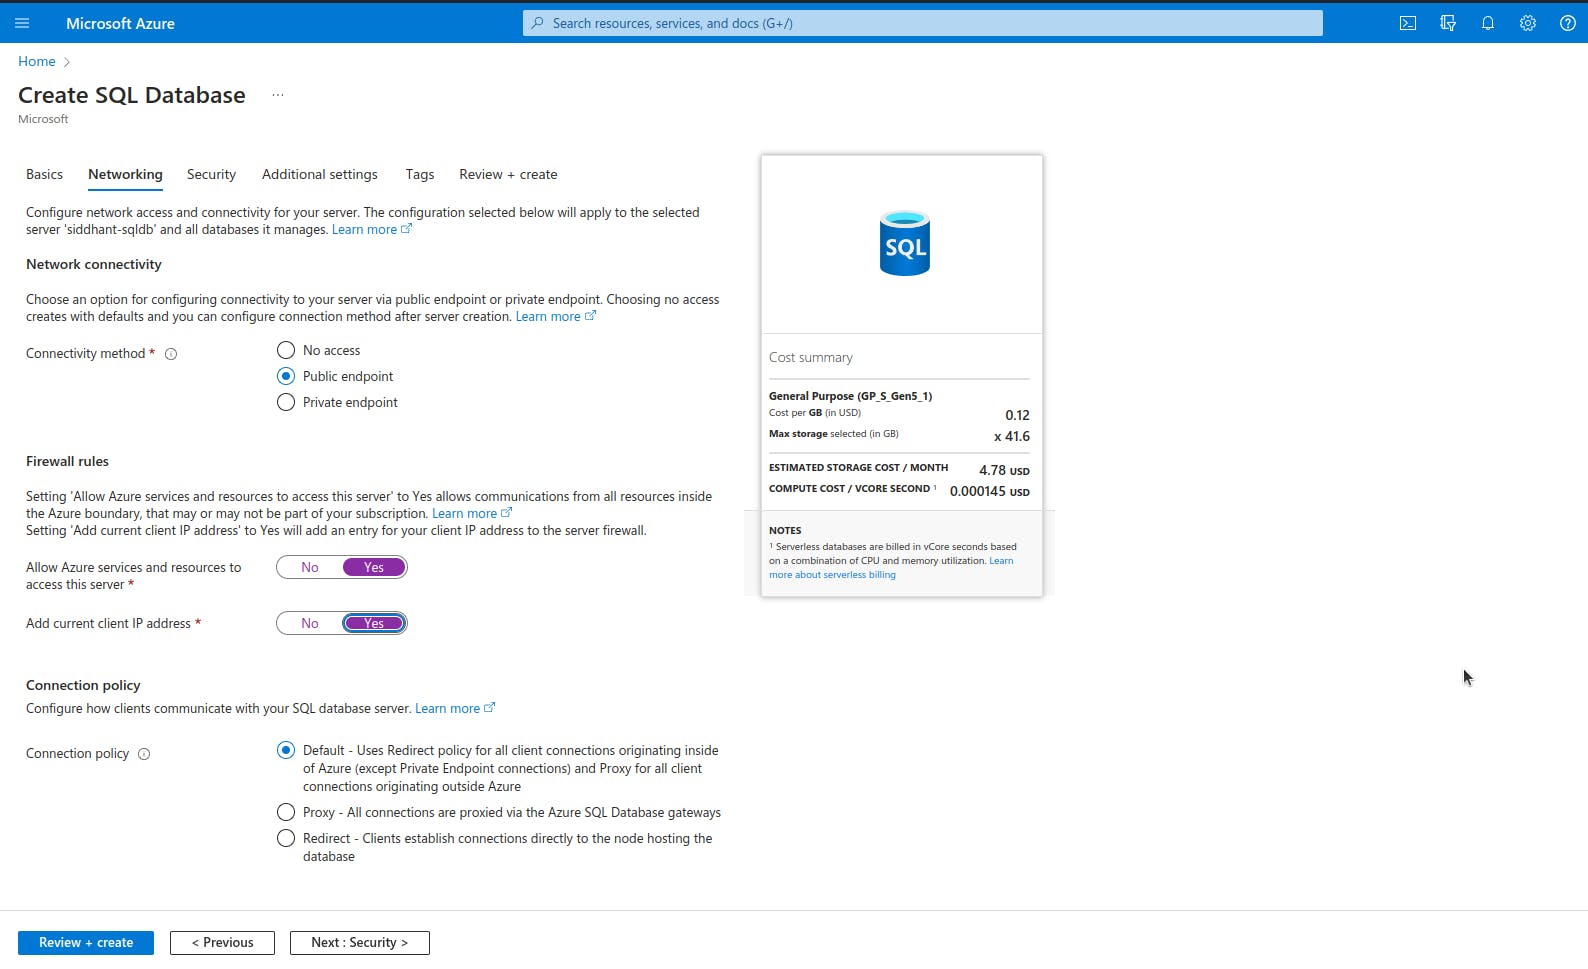
Step 5:Configure Networking and Firewall Rules
Connectivity Method: Select "Public endpoint" for development purposes. This allows access from the public internet (use private endpoint for secure environments).
Firewall Rules: Select "Yes" for both options to allow all incoming connections and outgoing connections to Azure services.
Step 6:Review and Create
- Review all the selected options and click "Create" to start building your database.


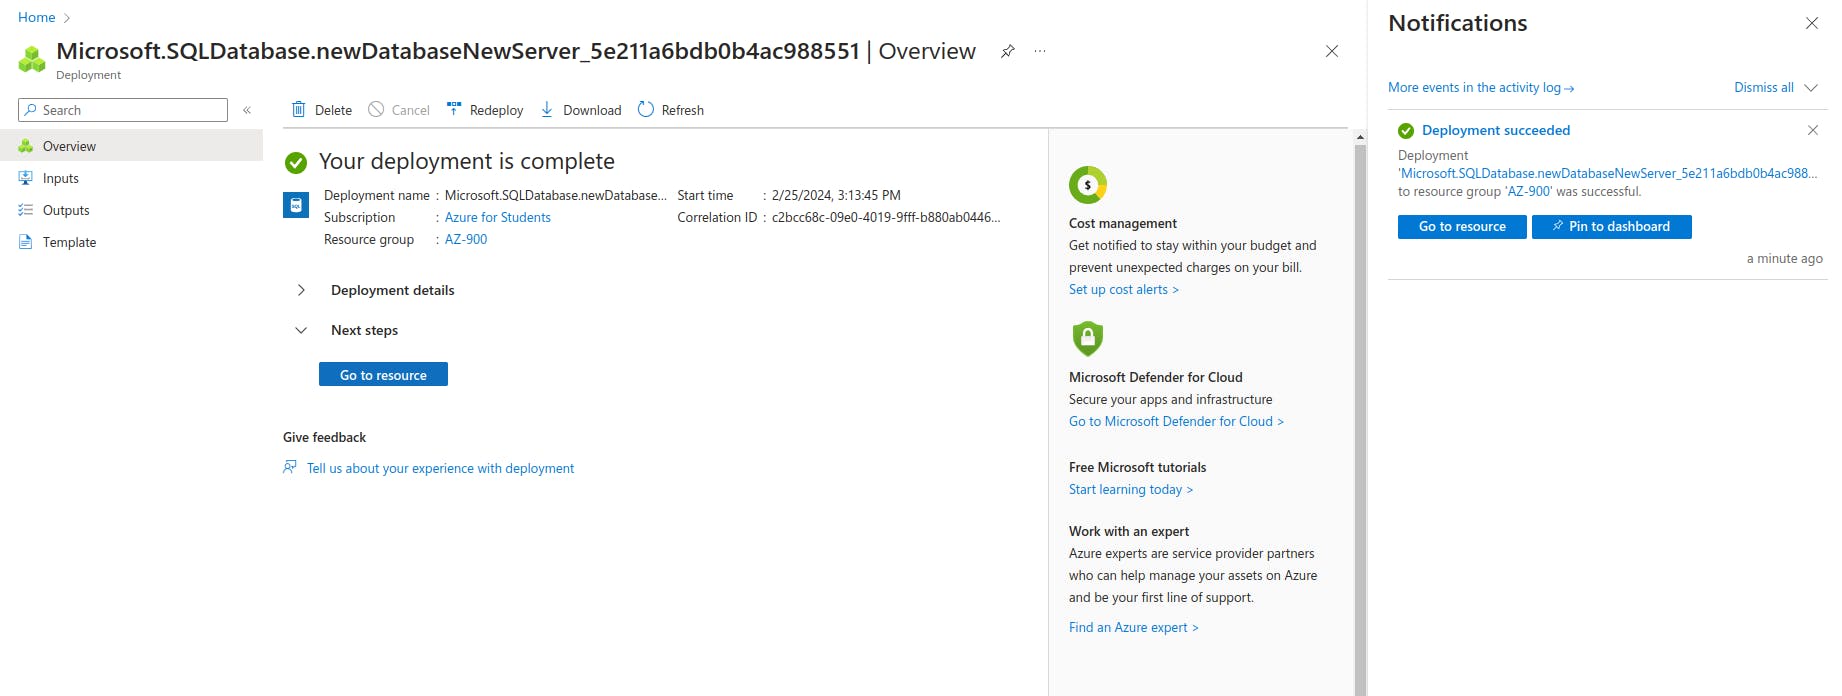
Step 6: Access and Query Your Database
Once creation is complete, click "Go to resource" to access your newly created database.
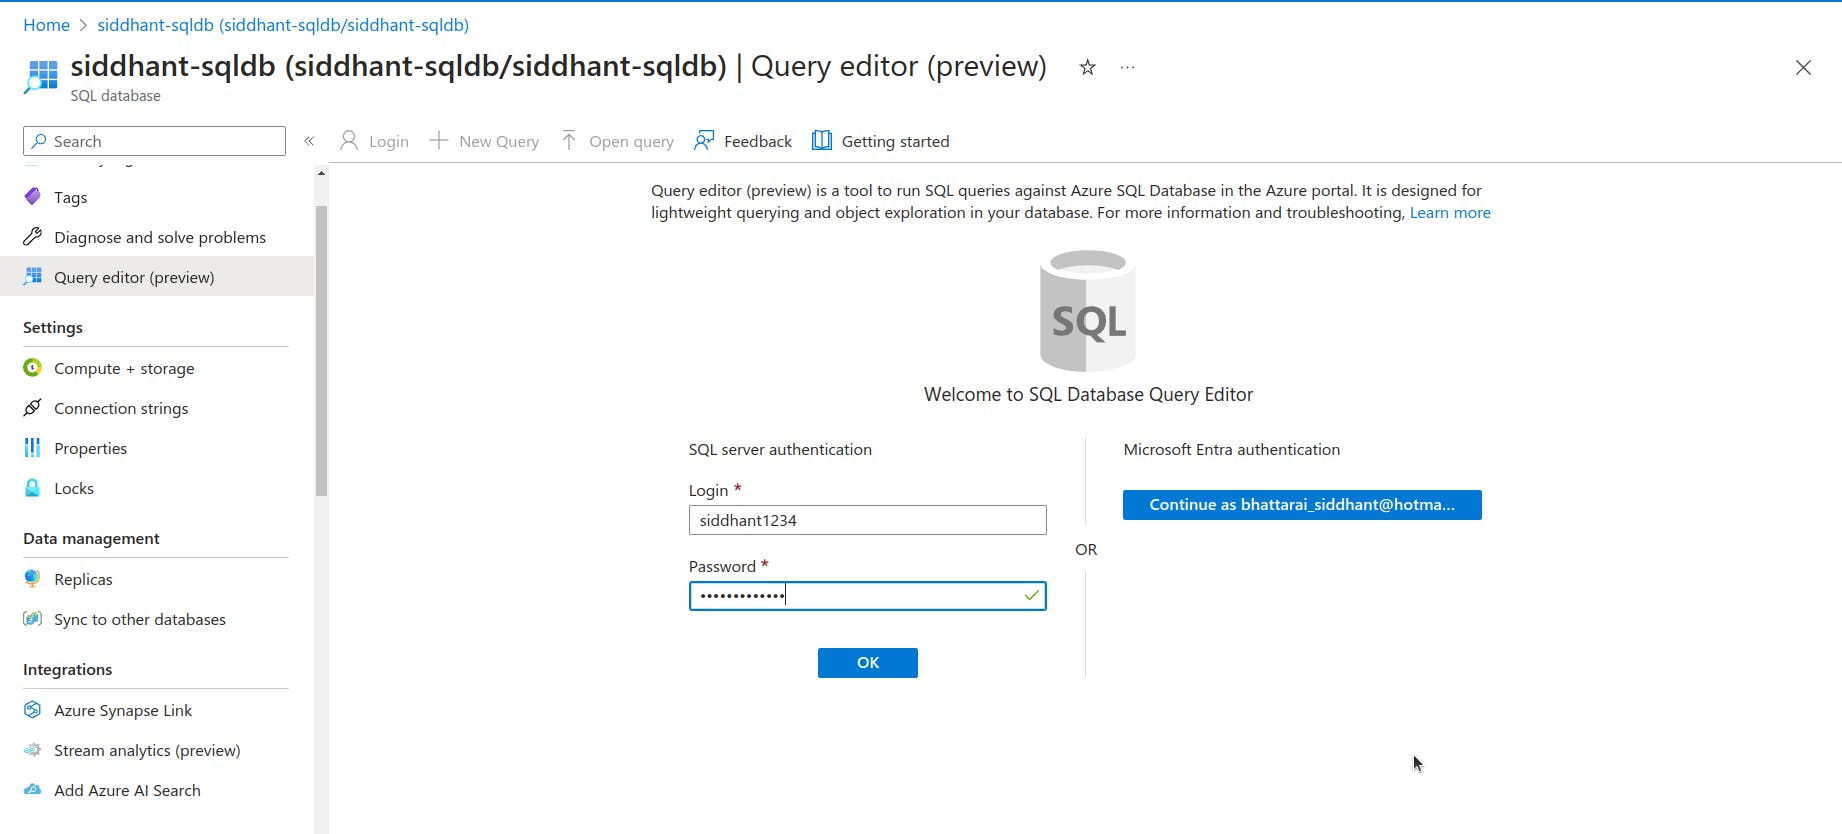
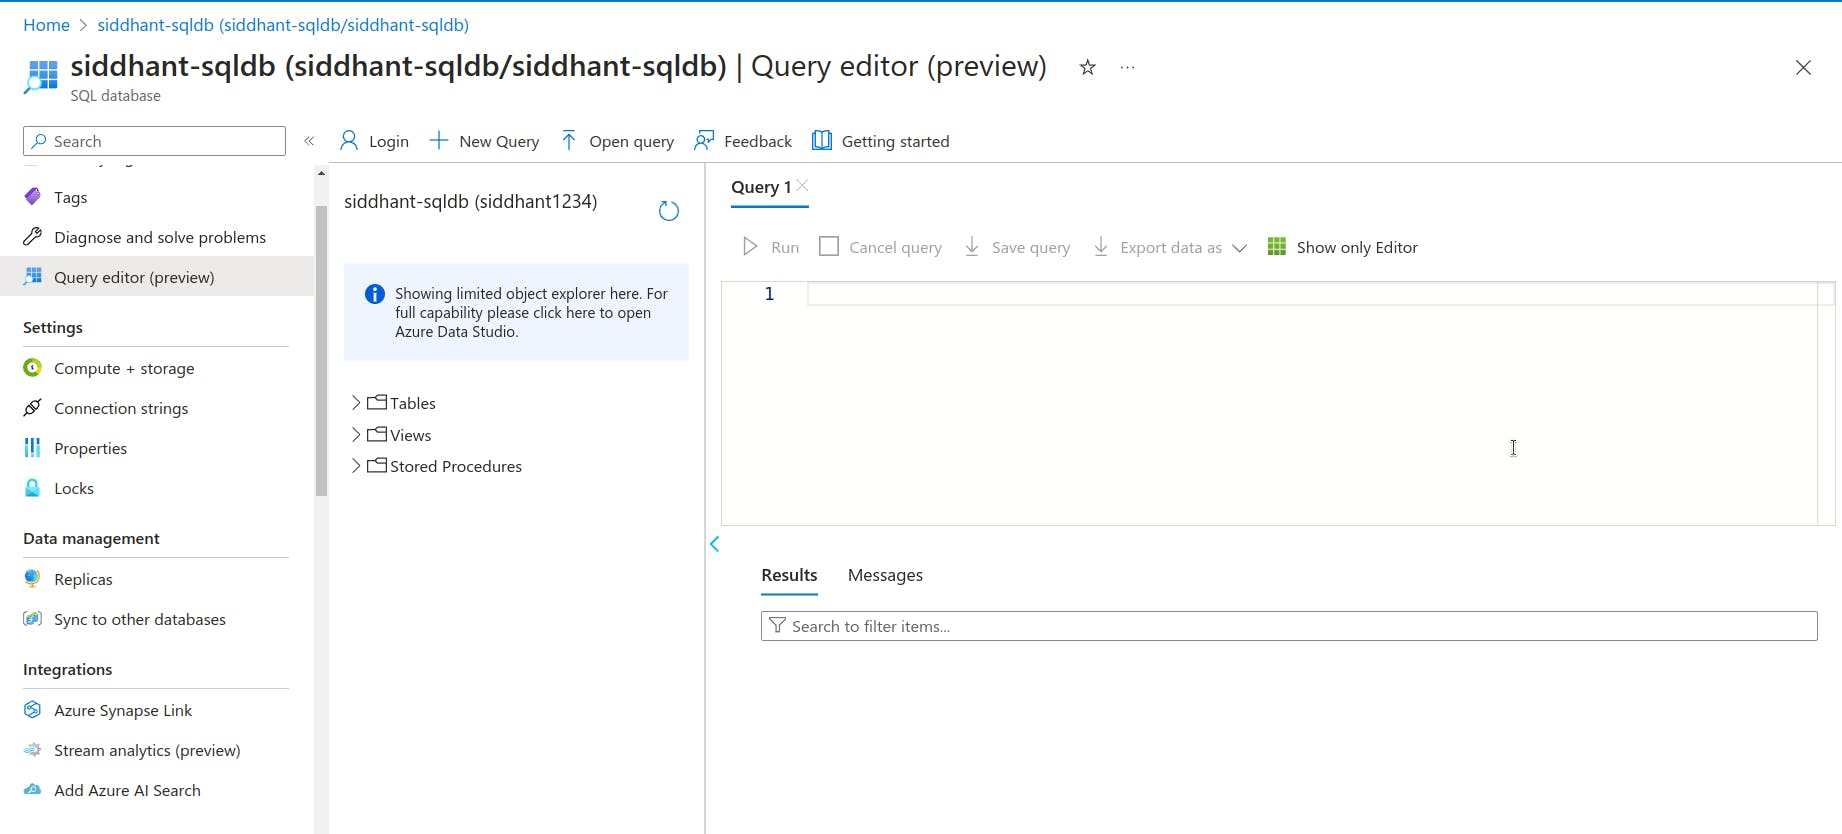
In the left navigation pane, select "Query editor (preview)".
Enter your database username and password, then click "OK".
You're now connected! Write and run your SQL queries to interact with the data in your database.


CREATE TABLE Persons (
    PersonID int,
    LastName varchar(255),
    FirstName varchar(255),
    Address varchar(255),
    City varchar(255)
);

Congratulations! You've successfully created and connected to your Azure SQL Database. Now, let your data exploration journey begin!