


Introduction:
In today's blog post, we will walk through the process of deploying a React frontend application using Amazon Elastic Container Registry (ECR), Elastic Container Service (ECS) Fargate, and an Application Load Balancer (ALB). This approach ensures scalability, reliability, and easy management of your containerized application in the AWS cloud.
Step 1: Setting up the EC2 Instance
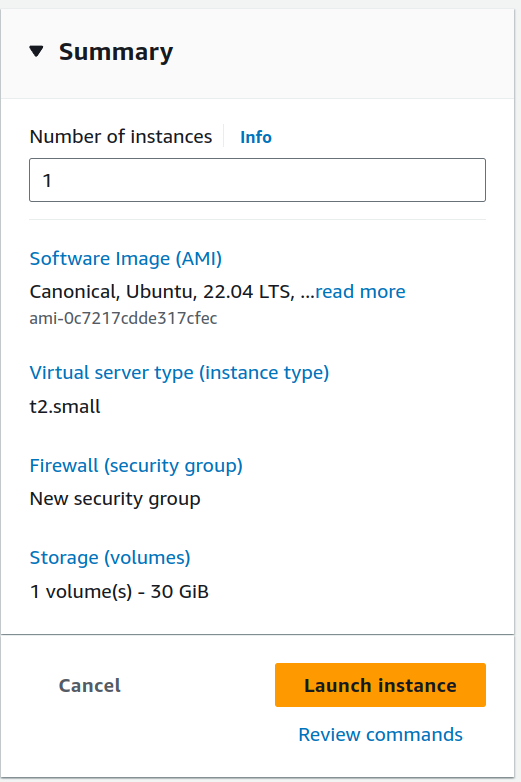
Start by launching an EC2 instance with the following specifications:
Instance Type: t2.small
Storage: 30 GB
Operating System: Ubuntu
- Connect to your EC2 instance using SSH.
ssh -i your-key.pem ubuntu@your-ec2-ip
Step 2: Installing Docker
Update your instance and install Docker.
sudo apt update
sudo apt install -y docker.io
Step 3: Adding User to Docker Group
Add the Ubuntu user to the Docker group to run Docker commands without sudo.
sudo usermod -aG docker $USER
Log out and log back in or run the following command to apply the changes.
su - ubuntu
OR Update the docker owner to the current user.
sudo chown $USER /var/run/docker.sock
Step 4: Cloning the React Frontend Code
Clone the React frontend code into your EC2 instance.
git clone https://github.com/siddhantbhattarai/react-ecommerce-frontend.git
cd react-ecommerce-frontend
Step 5: Creating a Dockerfile
Remove the existing Dockerfile if it exists.
rm Dockerfile
Now, create a new Dockerfile using a text editor (e.g., nano).
nano Dockerfile
Copy and paste the following Dockerfile content:
# Use an official Node runtime as a base image for building the app
FROM node:17-alpine AS builder

# Set the working directory in the container
WORKDIR /usr/src/app/frontend

# Copy package.json and package-lock.json to the container
COPY package*.json ./

# Install frontend dependencies
RUN npm install

# Copy the rest of the application files to the container
COPY . .

# Build the frontend app
RUN npm run build

# Use NGINX as a lightweight base image to serve the app
FROM nginx:alpine

# Copy the built app from the previous stage
COPY --from=builder /usr/src/app/frontend/build /usr/share/nginx/html

# Expose port 80 to the outside world (default for HTTP)
EXPOSE 80

# CMD is not needed as NGINX image has a default CMD to start the server
Changes and Explanation:
Multi-Stage Build: The Dockerfile now uses multi-stage building. The first stage (
FROM node:17-alpine AS builder) is responsible for building the React app, and the second stage (FROM nginx:alpine) uses the lightweight NGINX image to serve the built application.Copying Build Artifacts: The
COPY --from=builder /usr/src/app/frontend/build /usr/share/nginx/htmlcommand copies the built React app from the builder stage to the NGINX image.Port Exposition: NGINX listens on port 80 by default, so the
EXPOSE 80line is added to expose the NGINX server to the outside world.
Step 6: Building and Pushing Docker Image to ECR
docker build -t react-frontend-app .
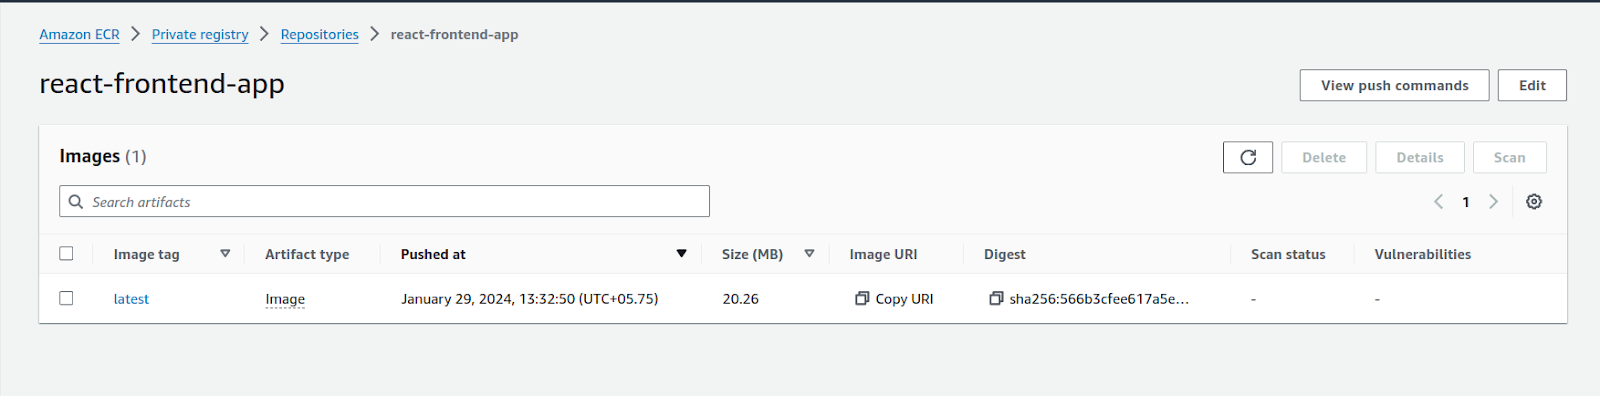
Create an ECR repository using the AWS Management Console or using aws-cli.
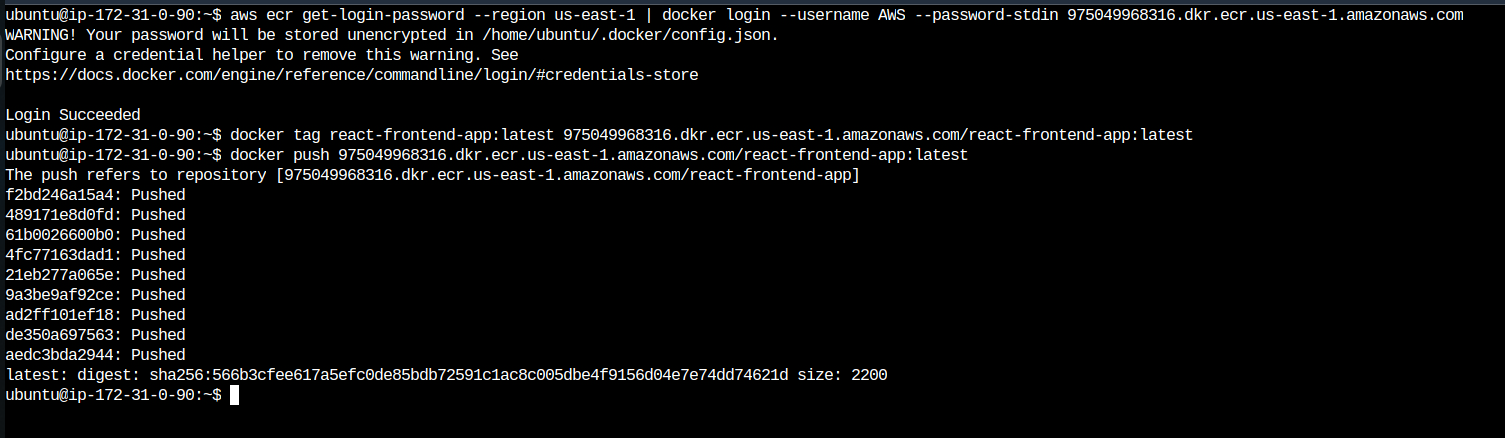
Authenticate Docker to your ECR registry using the
aws ecr get-login-passwordcommand.
# Create an Amazon ECR repository for a React Frontend App in the US East (N. Virginia) region
aws ecr create-repository --repository-name react-frontend-app --region us-east-1

#Tag your Docker image with the ECR repository URI:
aws ecr get-login-password --region <your-region> | docker login --username AWS --password-stdin <your-account-id>.dkr.ecr.<your-region>.amazonaws.com

#Push the image to ECR:
docker push <your-account-id>.dkr.ecr.<your-region>.amazonaws.com/react-frontend-app:latest
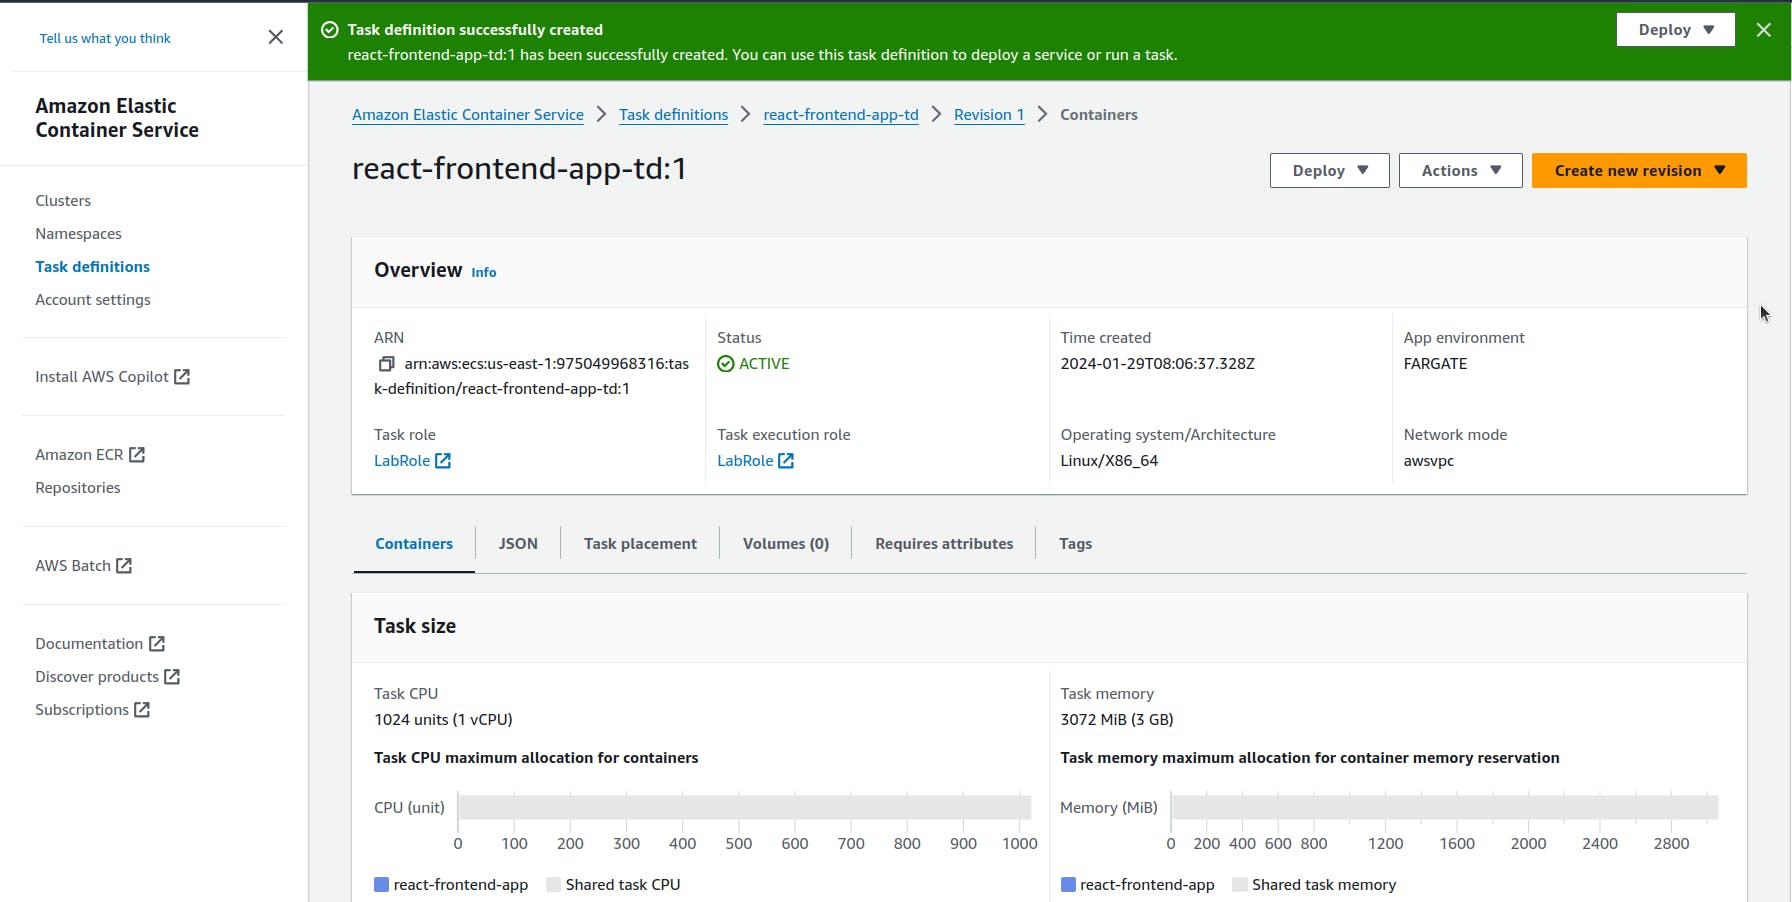
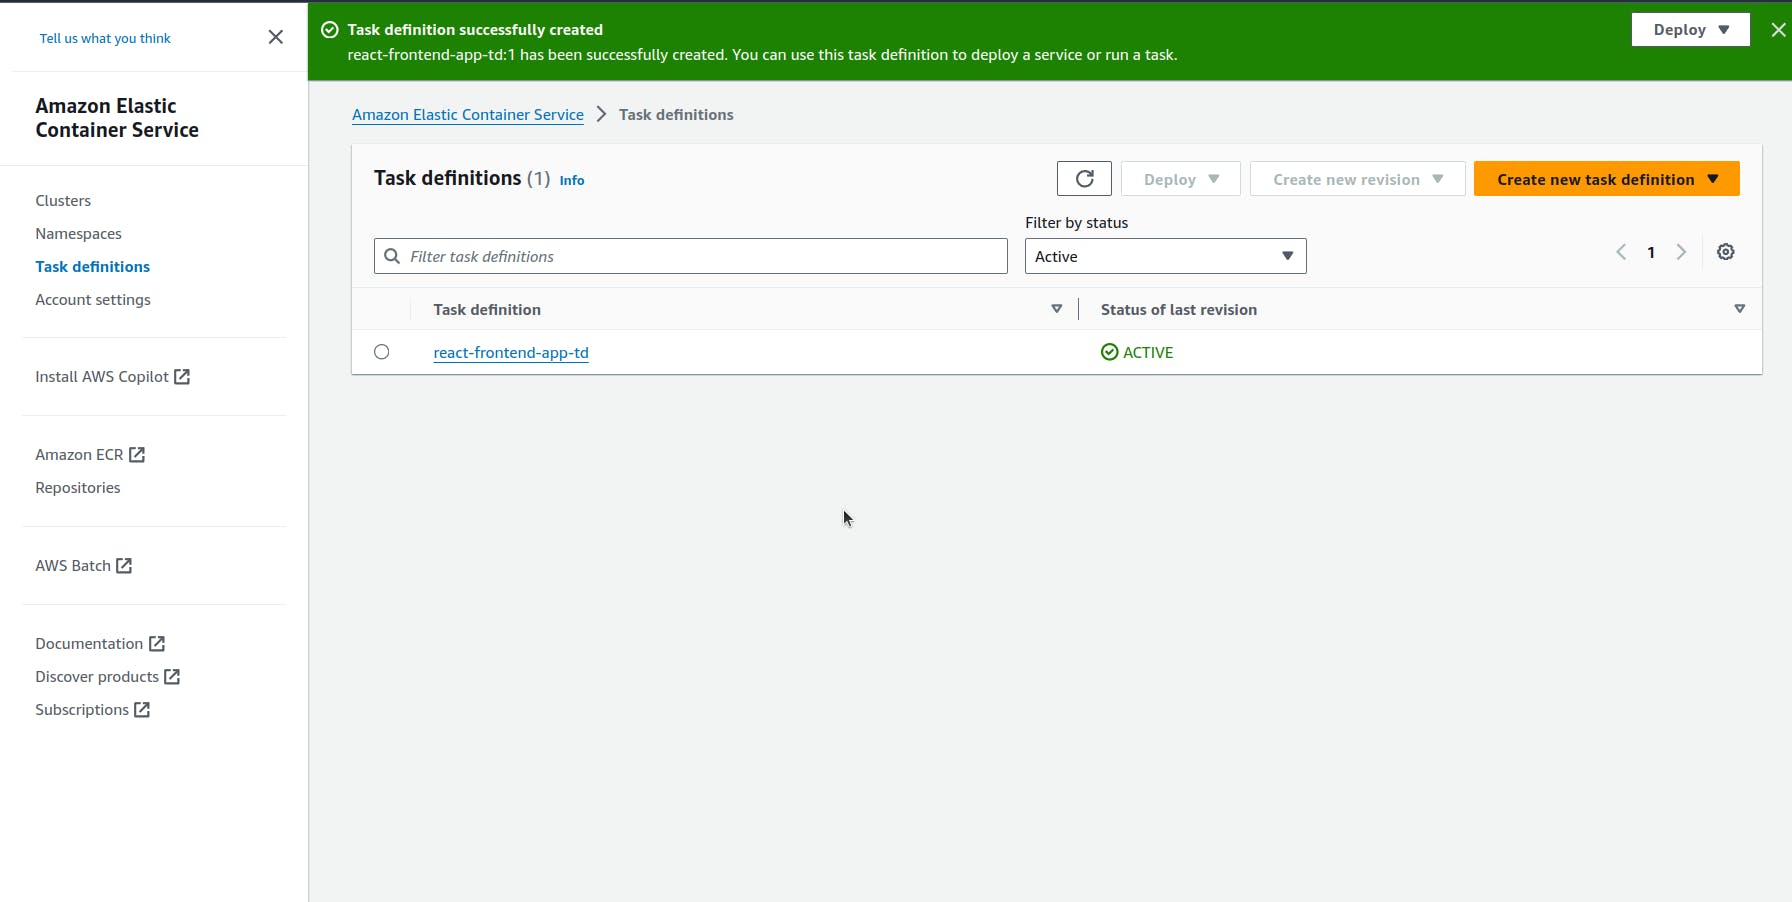
Step 7: Configuring ECS and Fargate
In the AWS Management Console, navigate to ECS. Create a new task definition, specifying the Docker image from your ECR repository. Then, create a Fargate cluster and run a task using the defined task definition.

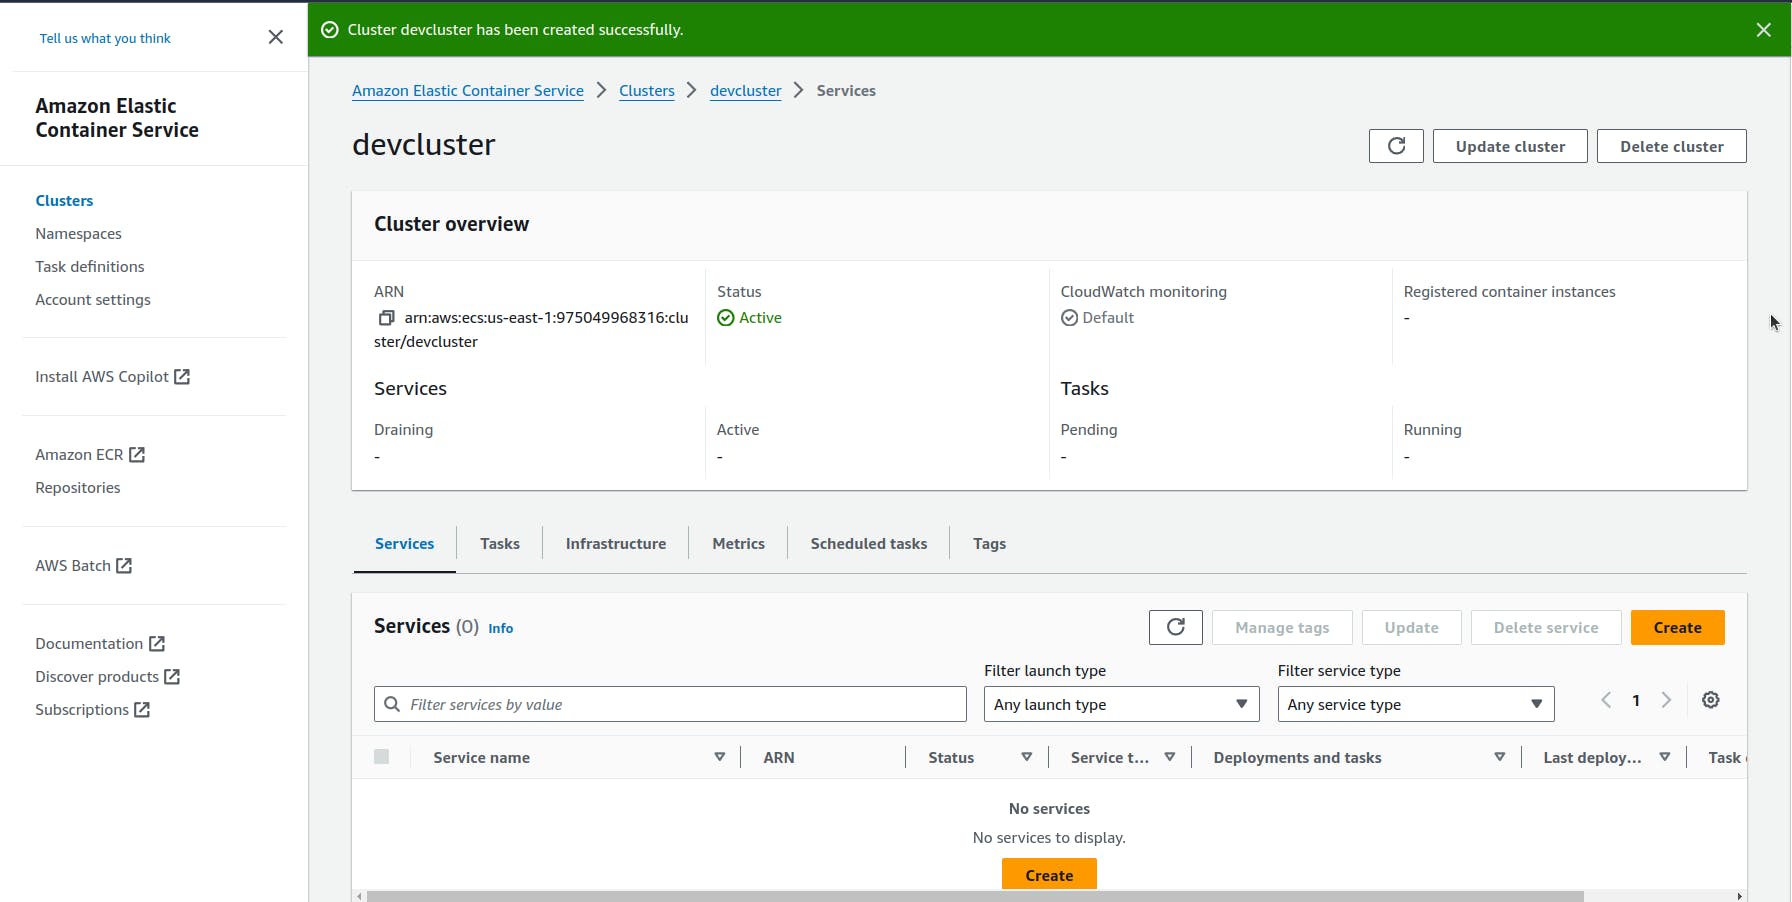


Step 8: Create an ECS Service with Application Load Balancer
Go to the Services section and create a new one.
Give it a name and choose your cluster from the dropdown.
Select the launch type as Fargate.
Under "Task definition", choose the task definition you created.
Set the desired number of tasks (e.g., 1 to start).
Under "Network configuration", choose an existing VPC or create a new one.
Add a public load balancer:
Type: Application Load Balancer
Target group: Create a new target group with the following settings:
Target type: Container instances
Port: 80
Health check protocol: HTTP
Health check path:
/your-app-health-check-path(e.g.,/)
Listener:
Port: 80
Default actions: Forward requests to the target group.
Review and create the service.
Congratulations! You have successfully deployed your React frontend application using Amazon ECR, ECS Fargate, and an Application Load Balancer. This deployment architecture provides a scalable and reliable solution for hosting containerized applications in the AWS cloud.